Deployment Pipeline Details
Terminology
See Naming Conventions.
Overview
Each component is built by Jenkins. The build is controlled by a Jenkinsfile located at the root of the components source code repository. The component’s source code is scanned using SonarQube to check code quality and identify any significant issues (such as lack of test coverage or known security vulnerabilities). If the pre-defined quality gates are not passed then there is the option to stop the pipeline and abandon the current build or deployment process.
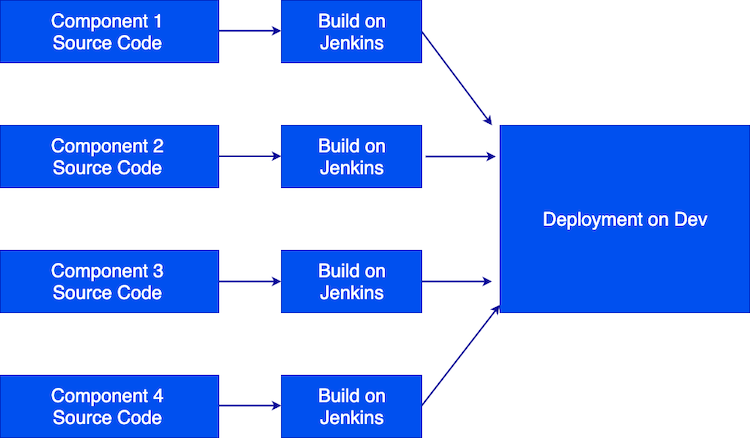
Figure 1: The pipeline for building applications from source code
Each component is packaged as a Docker container at the end of the build process and given a unique image tag based on the Jenkins build number.
Deploying the Components
The pipeline is used to deploy the same build of a component (the Docker container) to the development, staging and production environments, but different tests take place between each deployment step.
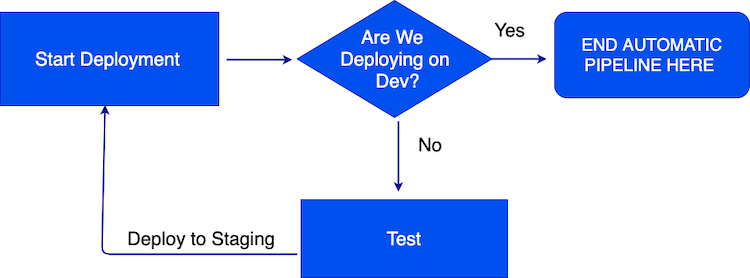
Figure 2: The pipeline for automatically deploying applications to staging
Deploying to Development and Staging
The deployment of all the components for a CESSDA application are controlled by a single Jenkinsfile in a repository called cessda.${app_name}.deploy, where ${app_name} is the name of the application as a three-letter code. This repository stores the configuration of the components in the form of Kubernetes manifests. These define the settings used by each component and, if necessary, secrets that hold credentials and other sensitive information.
A new deployment occurs every time code changes are pushed to any of the component source code repositories. This deployment occurs on the development-cluster and is exposed at the development endpoint of the application.
A conditional stage in the Jenkinsfile will automatically start Selenium tests only when a new deployment occurs on the development-cluster. This prevents infinite loops occurring when the tests finish and a new staging build is created. When the tests pass, the Docker images are tagged as staging and are deployed to the staging-cluster. Re-tagging occurs to show that these images have been certified to function together and should be deployed together.
stage('Run Selenium Tests') {
    steps {
        build job: 'cessda.${app_name}.test', wait: false
    }
    when {
        environment name: 'cluster', value: 'development-cluster'
    }
}
Figure 3: The code that prevents the infinite loops. From cessda.${app_name}.deploy/Jenkinsfile.
Deploying to Production

Figure 4: The pipeline for deploying applications to production
Deploying to the production-cluster is initiated by a manual step and is done with the Jenkins job cessda.${app_name}.deploy.prod. To deploy a new version of the application, select ‘Build with parameters’ and enter the staging build number that you want to deploy.

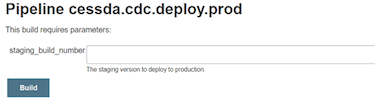
Figure 5: An example of the production build job from CDC
The staging build number entered here MUST be a number found in https://jenkins.cessda.eu/job/cessda.${app_name}.test that has passed. This is where the staging build numbers are assigned. This also ensures that a development build cannot directly be deployed to production.